Learning / Remote Pro Legacy Articles / Editing Prints Adding Frames & Overlays
Editing Prints Adding Frames & Overlays
Introduction
Guests enjoy personalizing their prints by drawing on them, adding virtual props and emoji, and adding a border or overlay. We call this adding a ‘frame’ to the print. This tutorial works with
- Breeze Booth (DSLR +Windows) aka DSLR Remote Pro
- Breeze Booth (Webcam + Windows) aka Webcam Photobooth
- Breeze Kiosk
Note: This tutorial was updated on 12 November 2019.
What you need to do
- Enable signing and drawing on prints as usual
- Add your frames to the PhotoboothImages folder
- (Optional) Customize the icons to match your theme
- Run the booth
Enable signing and drawing on the prints
Booth (DSLR + Windows) aka DSLR Remote Pro
Select Advanced Settings, then Output Options Settings. Check the box marked Sign or draw on photos before printing, and OK as you leave.
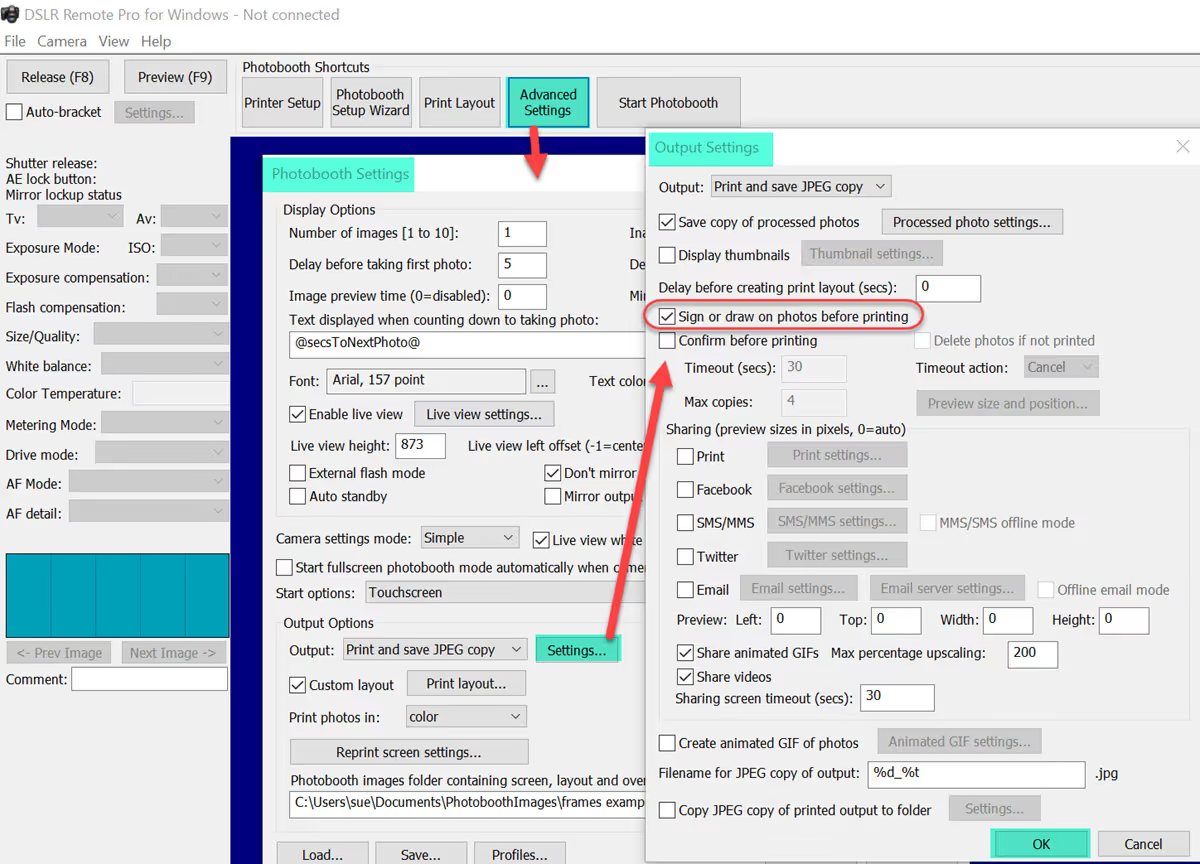
Enabling signing and drawing on prints in DSLR Remote Pro 3.14
Booth (Webcam + Windows) aka Webcam Photobooth
Select Advanced Settings, then the Output tab. Select Output Settings and check the box marked Sign or draw on photos before printing, and OK as you leave.
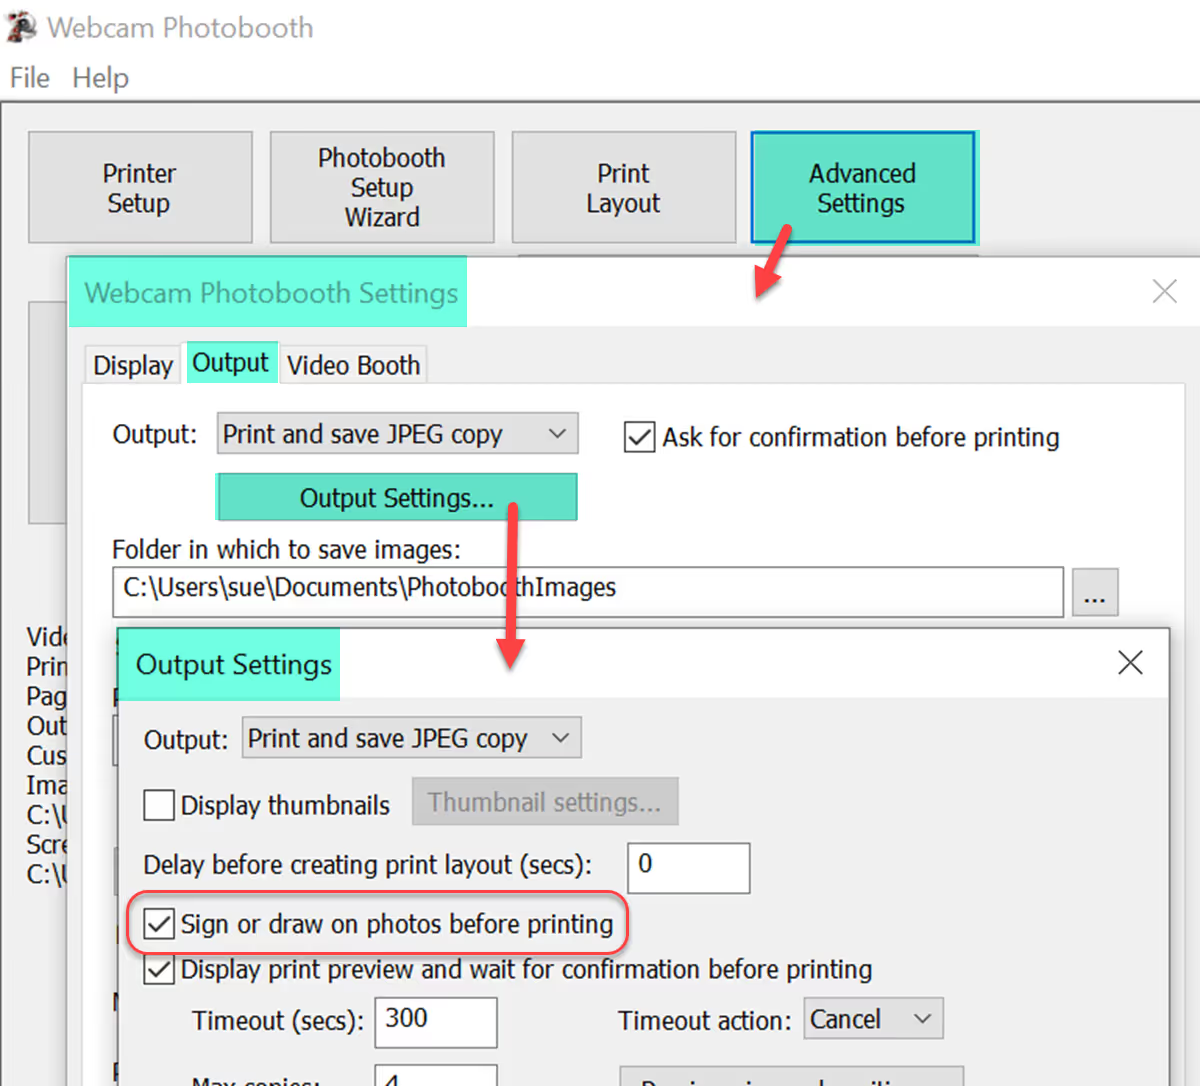
Enabling signing and drawing on prints in Webcam Photobooth 2.4
Kiosk
Select Settings. In the General tab check the box marked Drawing and signing of photos, and OK as you leave.
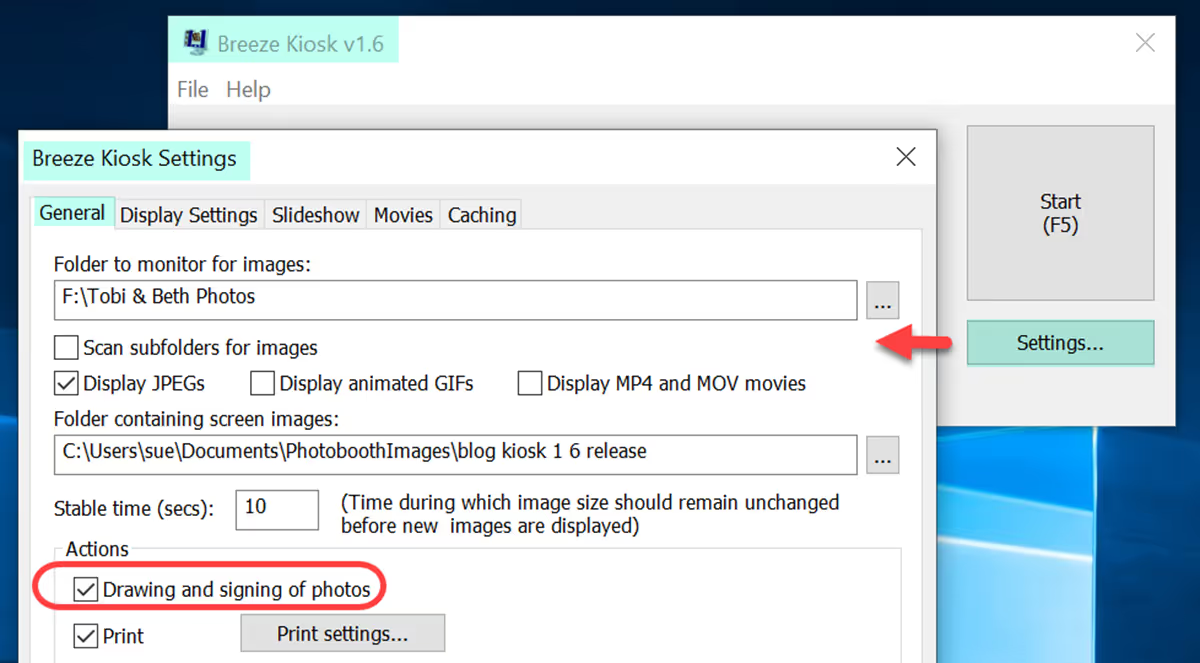
Enabling drawing and signing photos in Breeze Kiosk 1.6
Add your frames to the PhotoboothImages folder
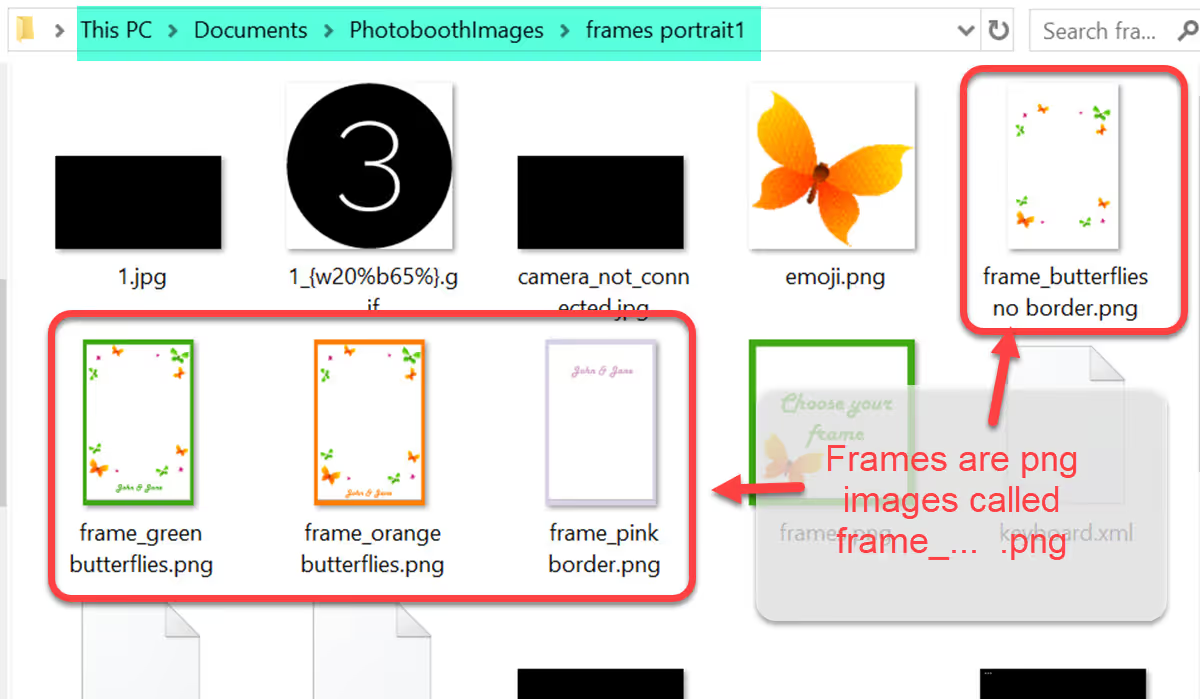
Your frames should be png images the same size in pixels as the print layout. Place them in the PhotoboothImages folder* for the event. The name of each frame must start frame_ as below:
*Kiosk calls the PhotoboothImages folder Folder containing screen images. When you customize the Kiosk interface you need to create a new folder containing your custom images. Point Kiosk to your screens folder in the General settings tab.
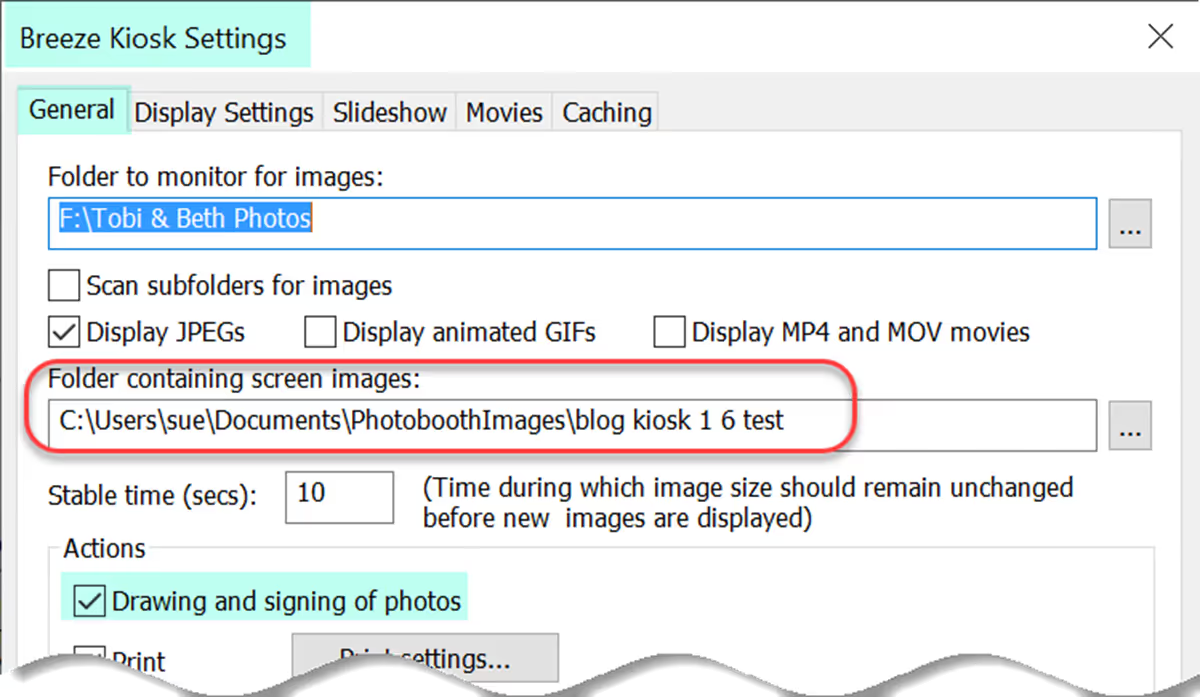
Kiosk screens folder containing custom frames, icons, background etc (Breeze Kiosk 1.6)
An extra touch – customize the icons to match your theme (optional)
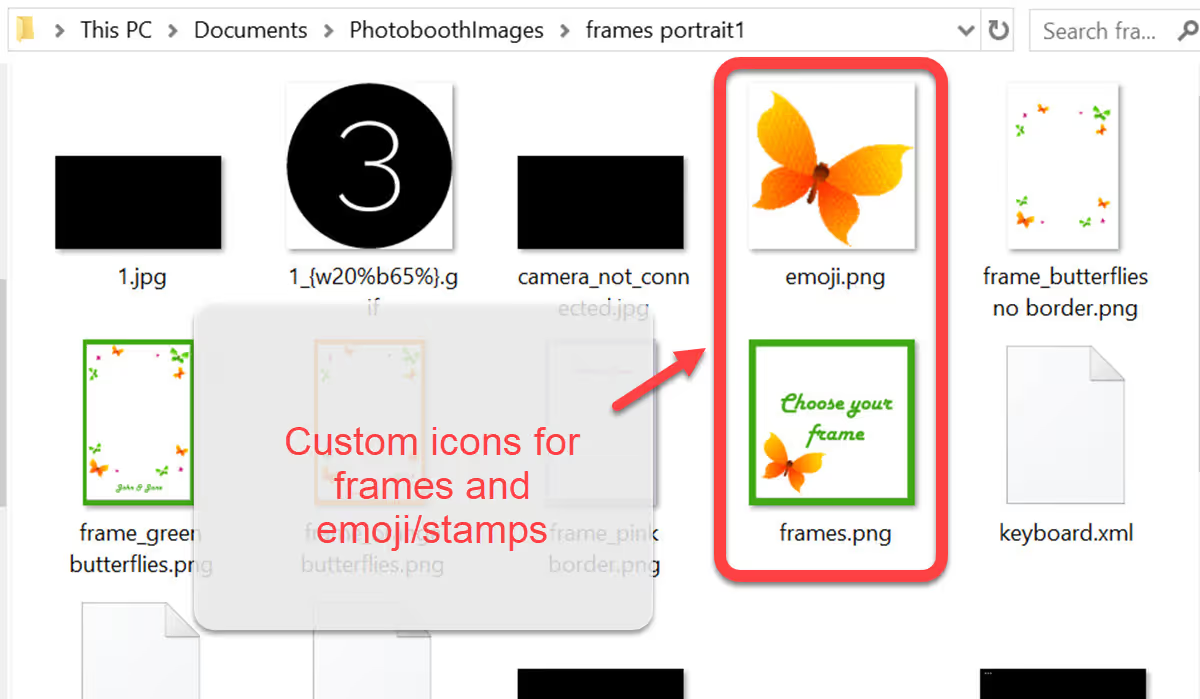
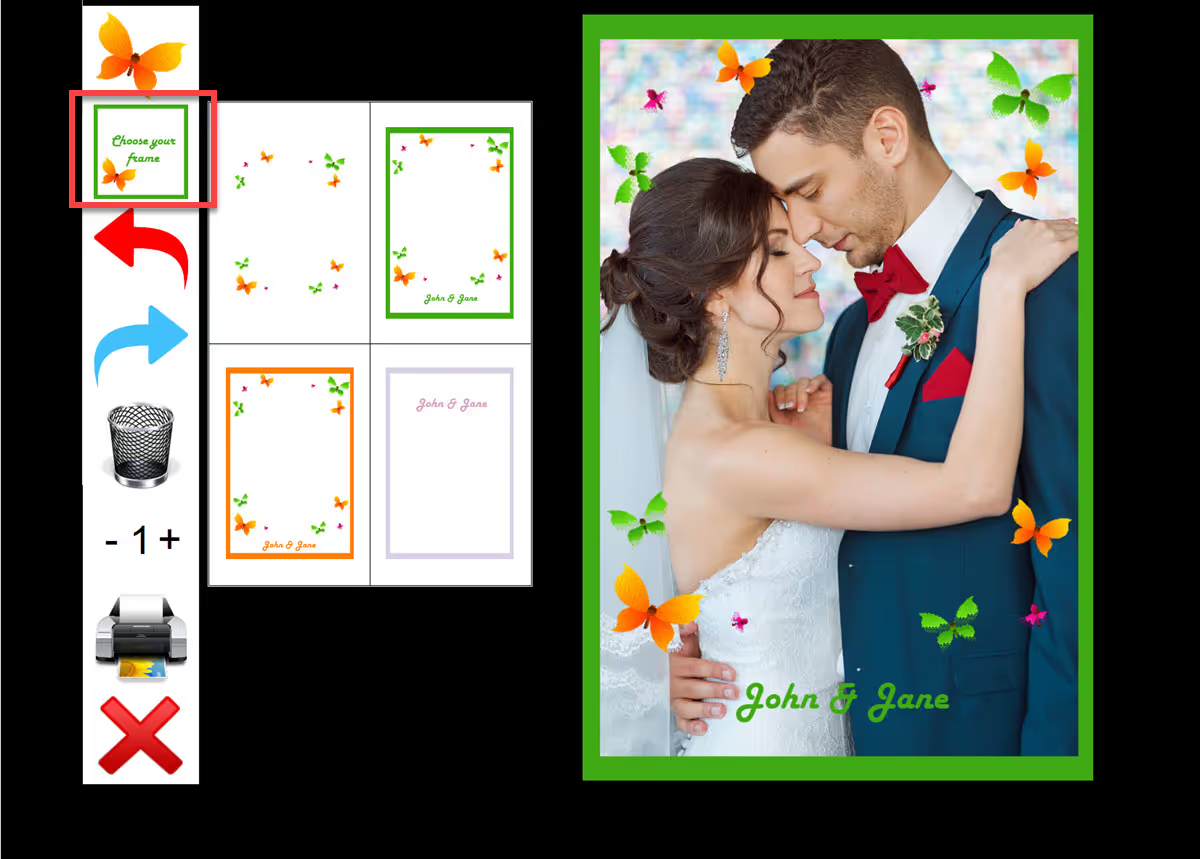
I also customized the icons to the left of this screen by placing my own images in the PhotoboothImages folder. You can customize all these icons in the same way. Make this screen your own.
Run the booth
When the photos have been taken, guests can decorate the print using the frames you included in the PhotoboothImages folder:
DSLR Remote Pro and Kiosk only
To display white frames and emoji, switch to the new mid gray background on the signing and drawing screen. The icons to the left of this screen are now monochrome on a white background.
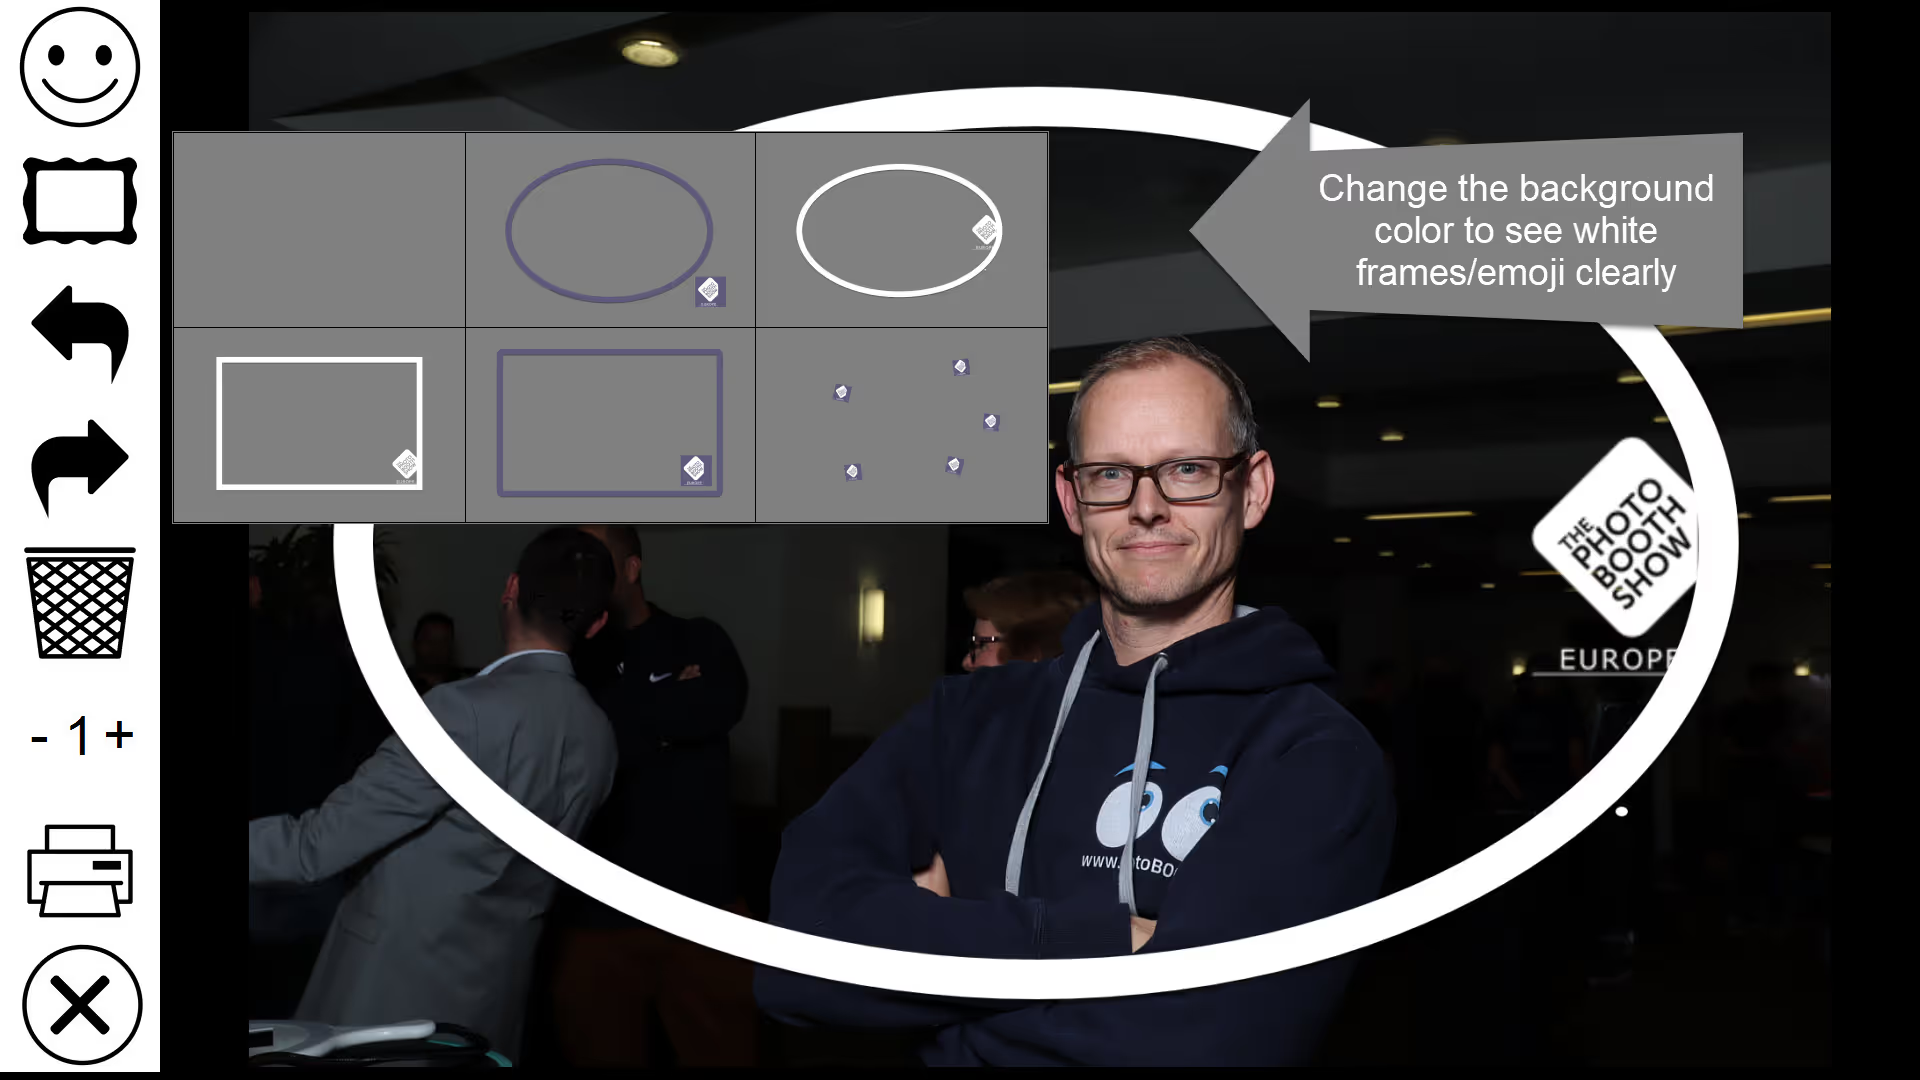
Frames and emoji can be shown on a gray or white background in Breeze DSLR Remote Pro 3.14.2 and Kiosk 1.6
To change the backgroound color, hold down Shift + Ctrl, and left click the mouse.
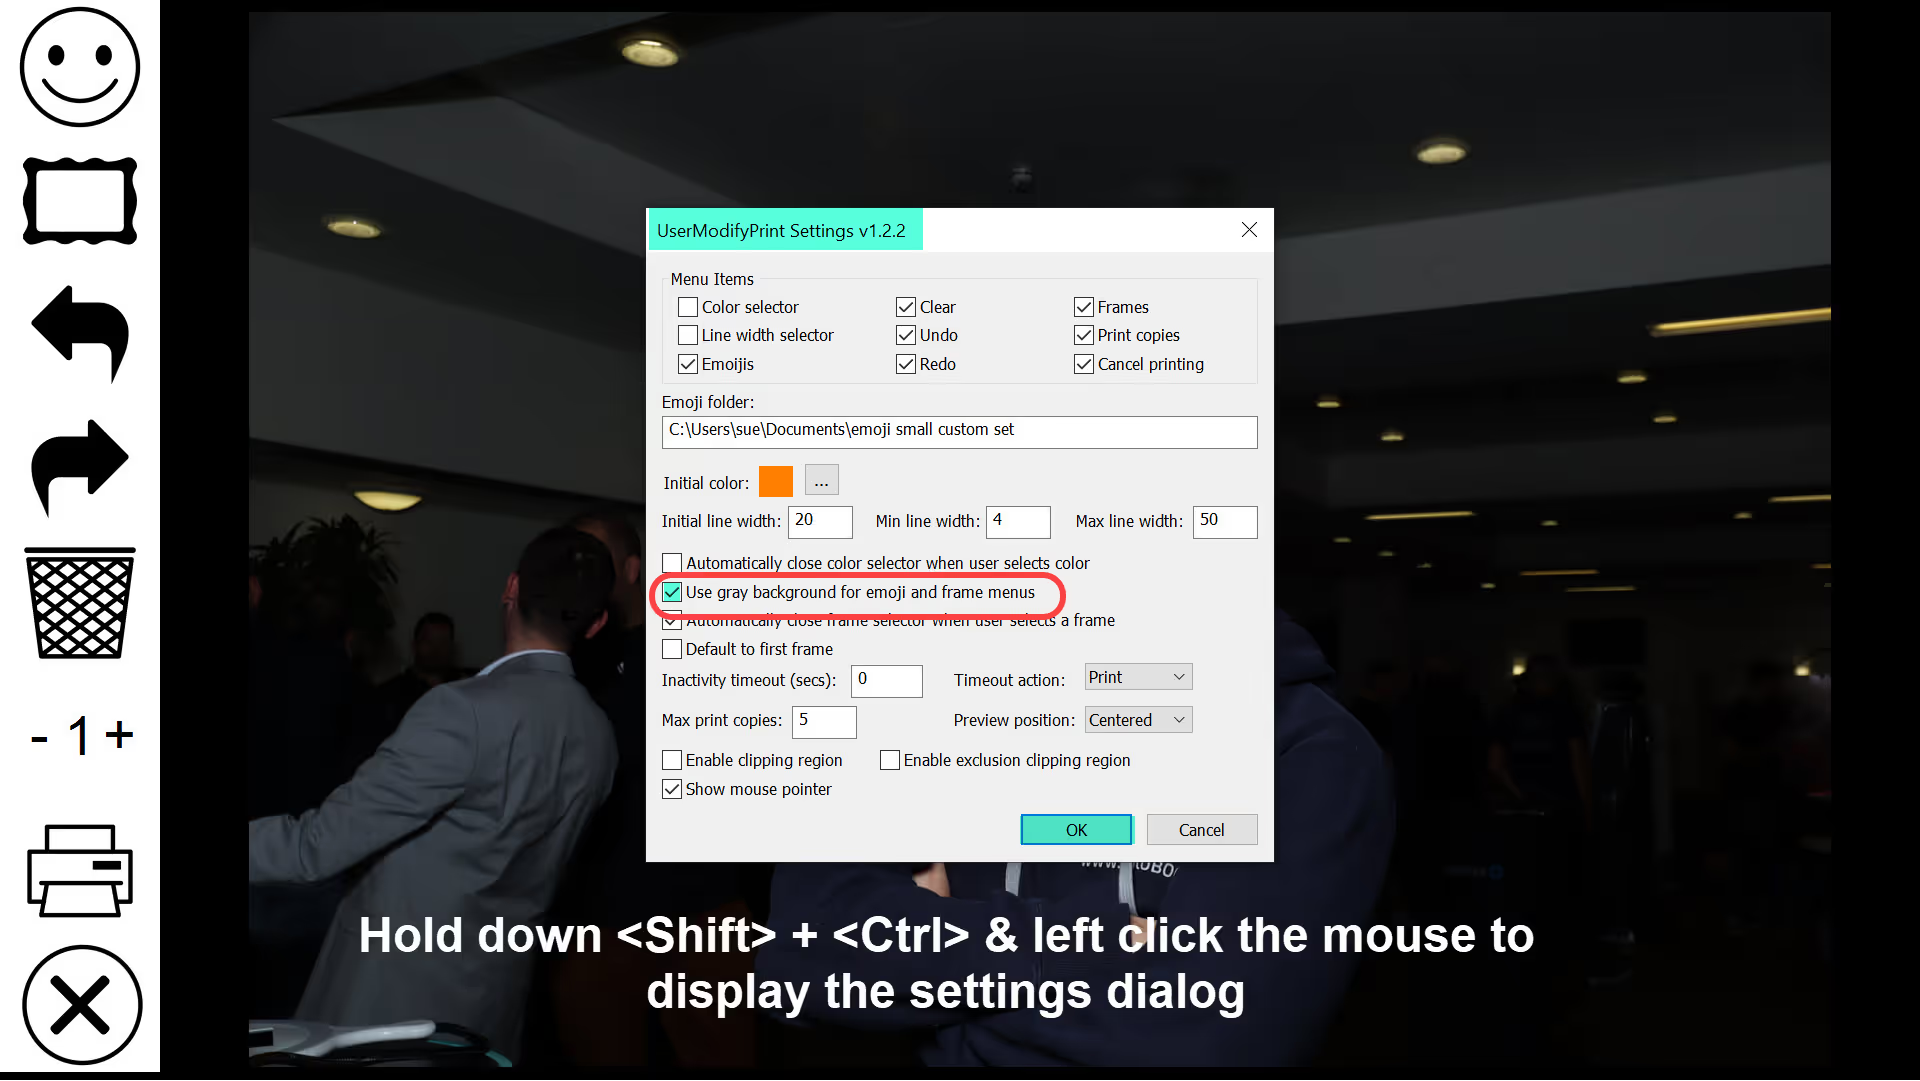
Signing and drawing screen settings dialog, DSLR Remote Pro 3.14.2
Get more from Kiosk
Guests love to sign, write messages and decorate their own prints. At a busy event, their enthusiasm for this can lead to long lines waiting to use the booth. Moving this feature to Kiosk has several advantages
- Keep the line moving and reduce queuing at the booth
- Guests can make, print and share different versions of each photo/print
- Original is still available to view, reprint and share