Blog / Getting Started DSLR Remote Pro (1): Photobooth Setup Wizard
Getting Started DSLR Remote Pro (1): Photobooth Setup Wizard
2017-11-07 · Sue Breeze · Animated GIFs, DSLR Remote Pro, Getting started, Prints, Screens, Setup Wizard

This is the first of a series of posts explaining how to setup your photo booth using the DSLR Remote Pro 3.7.3 Photobooth Setup Wizard.
Getting Started with DSLR Remote Pro (2) will explain how to customize your prints. Getting Started with DSLR Remote Pro (3) will explain how to customize your screens.
Downloading the program
First download DSLR Remote Pro from our website; and install the program on your computer. You can run the program as a free trial for up to two weeks from the day you download it.
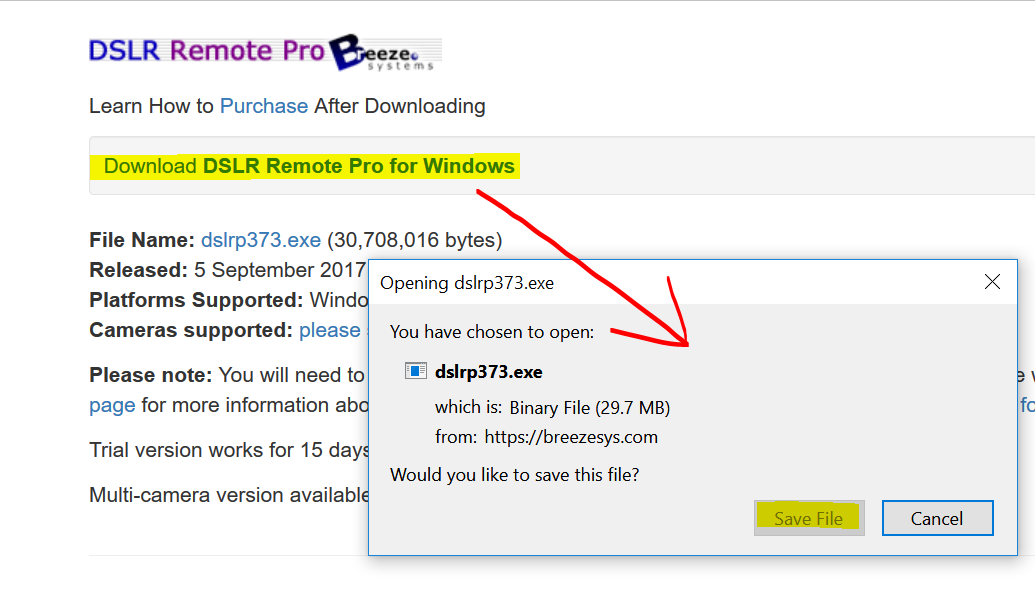
Downloading DSLR Remote Pro 3.7.3 from http://breezesys.com/downloads.htm#dslr
Start the program. If you are running a trial version of the program you will see the registration window each time you start. Click on Evaluate.
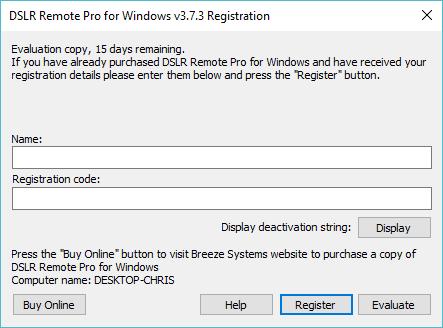
DSLR Remote Pro 3.7.3 registration dialog
There are five buttons at the top of the main screen. They are shortcuts to the most used parts of the program.
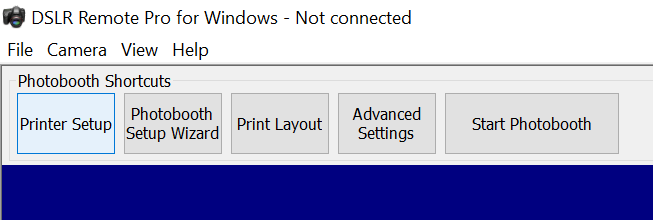
DSLR Remote Pro 3.7.3 Photobooth Shortcut buttons
- Printer Setup
- Photobooth Setup Wizard
- Print Layout
- Advanced Settings
- Start Photobooth
First connect your printer to the computer and switch it on. You can also connect and switch on your camera now; or use the ‘simulated camera’ at this stage.
Select Printer Setup to tell DSLR Remote Pro about about the printer you intend to use. Choose prints in Portrait or Landscape orientation.
Hint: Portrait is used for narrow strips of 3 or 4 photos, unless you have a DNP printer.
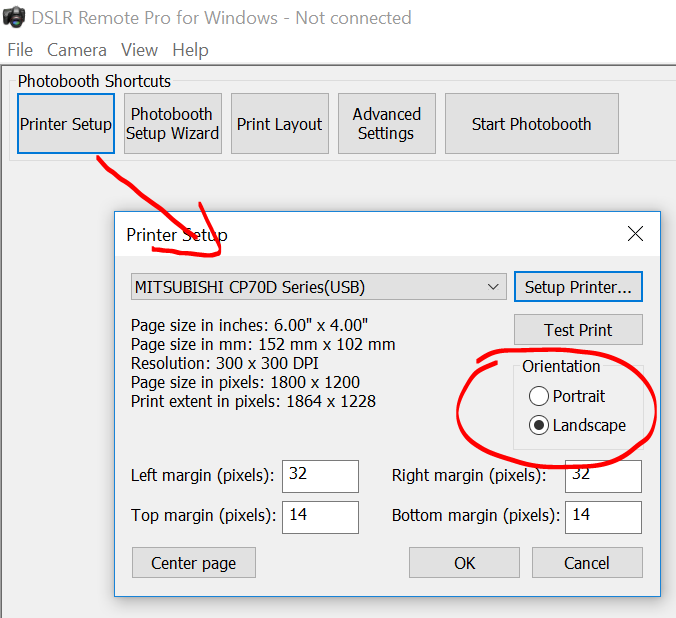
DSLR Remote Pro 3.7.3 Printer Setup screen showing Landscape oriented 6″ x 4″ print layout (non DNP printers)
Hint: For DNP printers using 6″ by 4″ media portrait and landscape orientation are swapped.
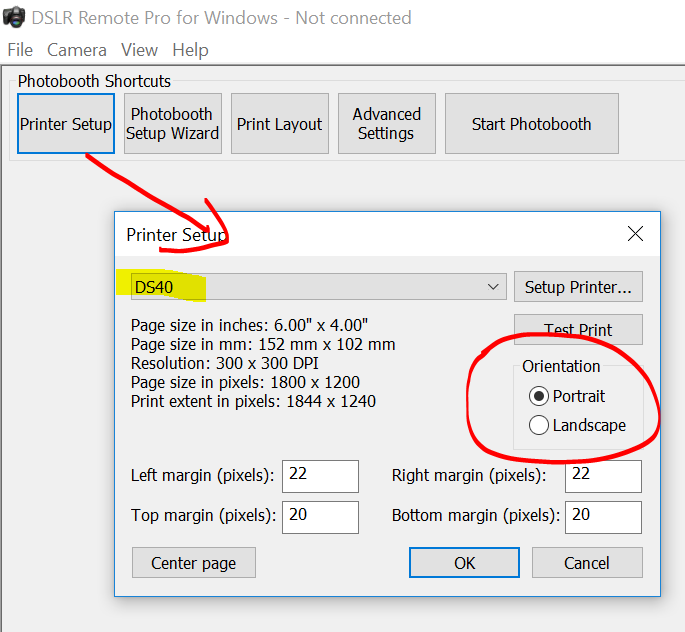
DSLR Remote Pro 3.7.3 Printer Setup screen showing Landscape oriented 6″ x 4″ print layout ( DNP printers only select ‘Portrait’ instead of ‘Landscape’)
Finish by clicking on OK.
Now start the Photobooth Setup Wizard. The program will prompt you to save any existing settings before the wizard overwrites them
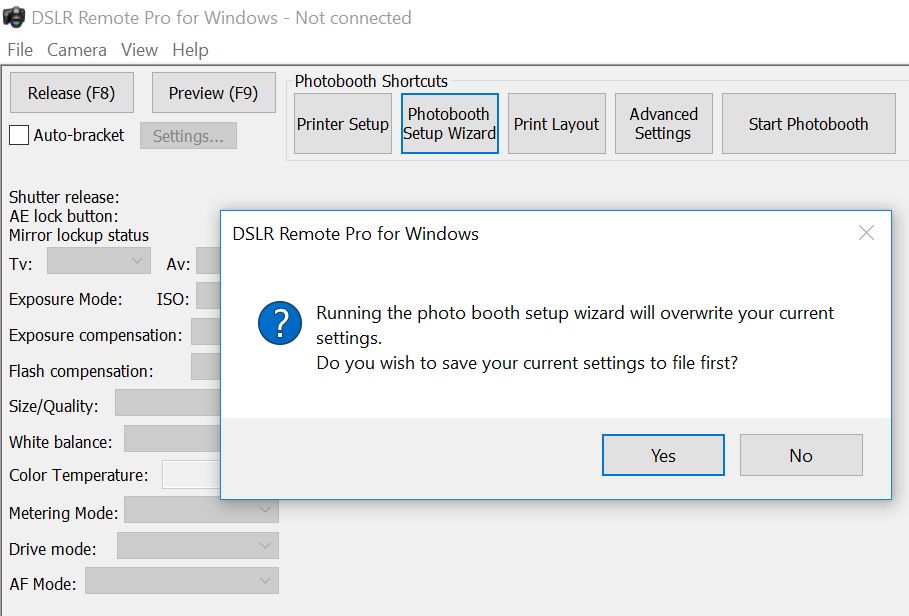
DSLR Remote Pro 3.7.3 check at start of Photobooth Setup Wizard
At Step 1 you choose the photo layout you need. The wizard offers a choice of 8 popular layouts; if you want something different choose whichever is closest to your design (you will be able to change this later).
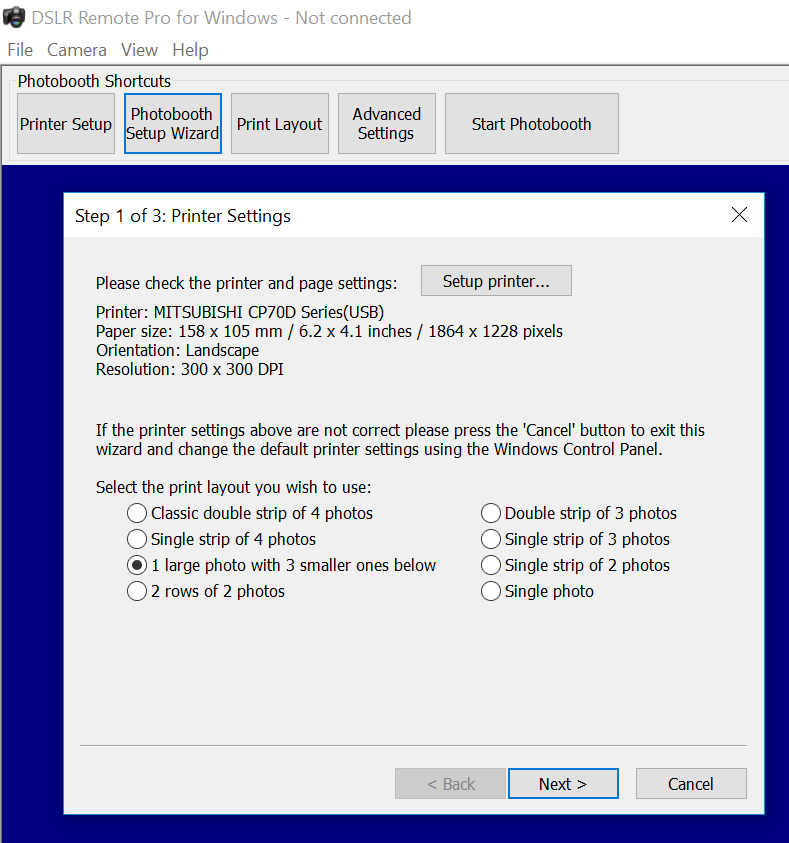
DSLR Remote Pro 3.7.3 Photobooth Setup wizard step 1. Landscape layout with 1 large and 3 small photos
Next Step 2. Tell the program which folder to save the photo booth photos you are going to shoot.
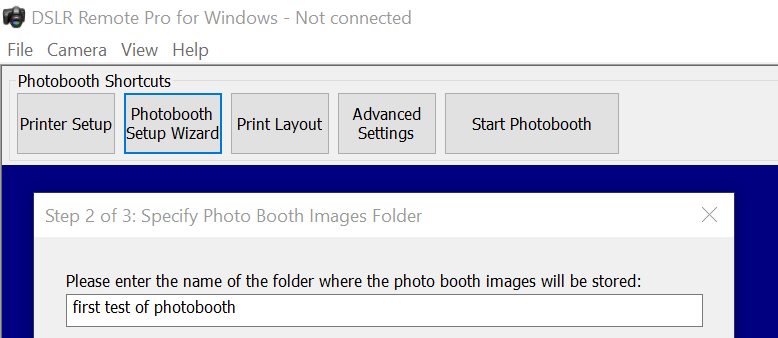
DSLR Remote Pro 3.7.3 Photobooth Setup Wizard Step 2
Finally choose the options you want to offer your guests.
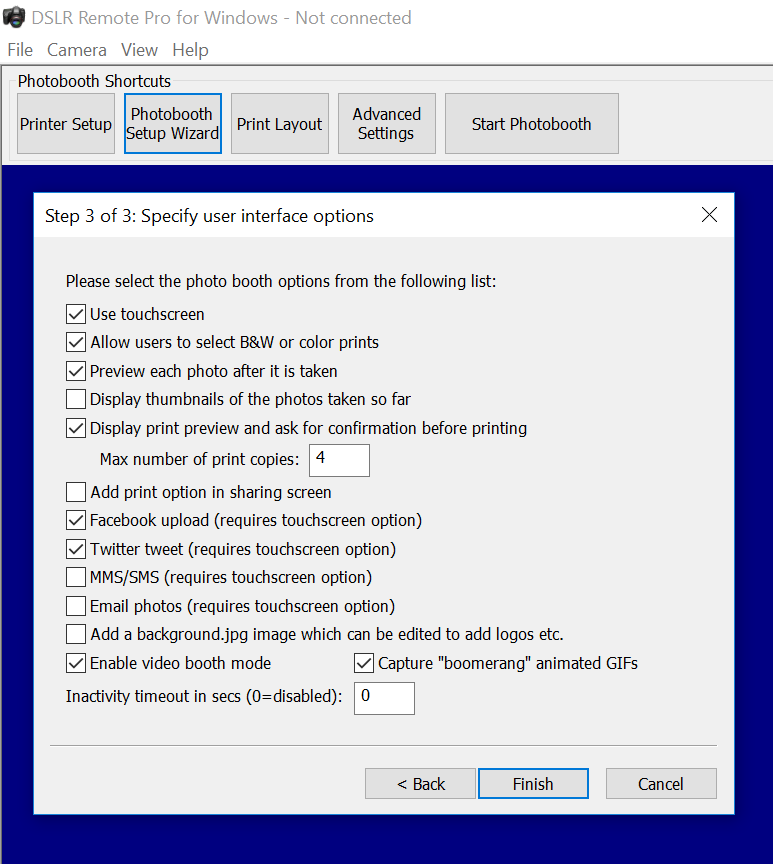
- The first 5 check boxes tell the Wizard whether you are using a touchscreen, whether guests can choose between color and B&W prints, whether to display a preview of each photo after it is taken and the maximum number of prints allowed.
- The next five check boxes tell the wizard whether a sharing screen (after the photos are taken) should offer uploads to guest’s Facebook and/or Twitter account, share photos by email or MMS/SMS, or offer optional printing. Hint: some operators prefer to offer browsing and sharing from a kiosk separate to the booth. You can use Breeze Kiosk for this. To share and print photos away from the booth leave these boxes unchecked.
- Beginners should leave ‘Add a background.jpeg’ blank at this stage. Print layouts can be branded/customised later.
- To offer ‘boomerang’ animated GIFs check ‘Enable videobooth..’ and ‘Capture Boomerang GIFs..’.
- To offer video booth check ‘Enable videobooth..’
Click on
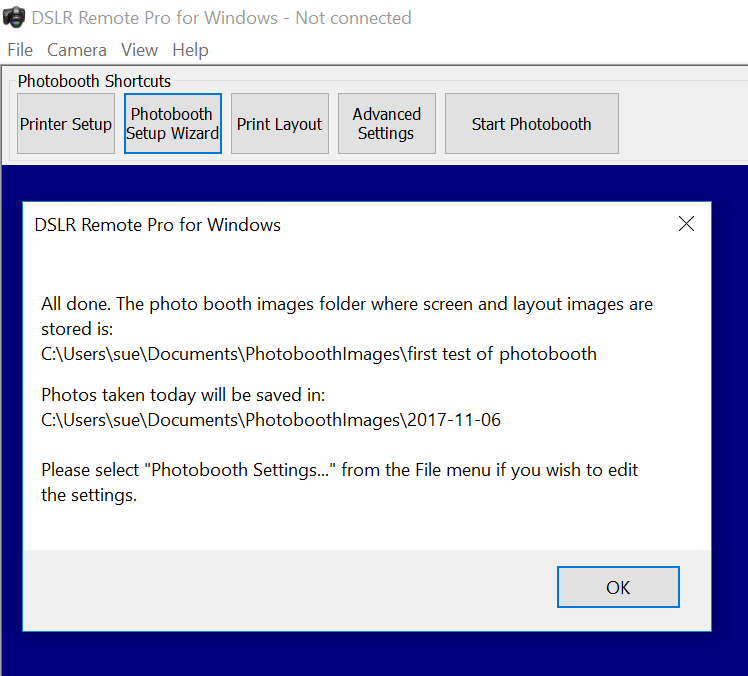
DSLR Remote Pro 3.7.3 Photobooth Setup Wizard completed
Close this window, connect your camera and switch it on before selecting ‘Start Photobooth’. That’s it!
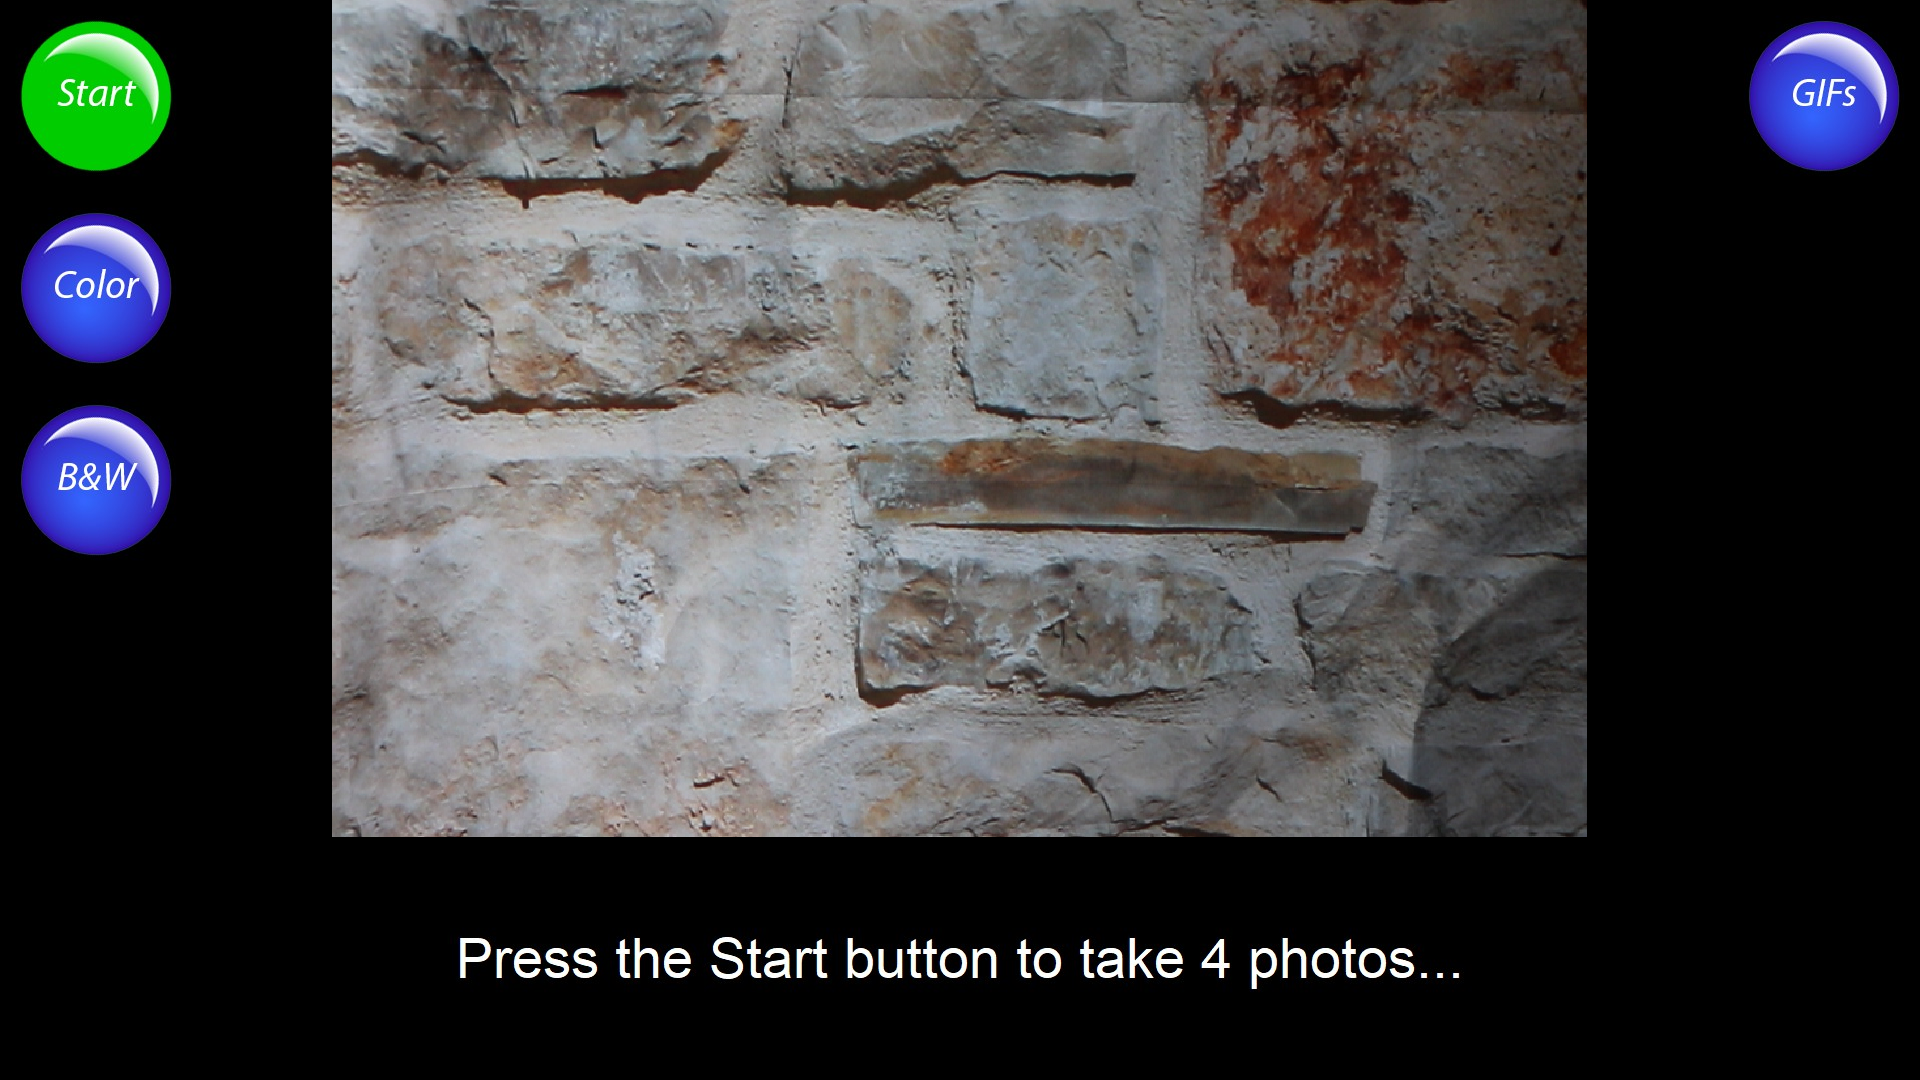
DSLR Remote Pro 3.7.3 default photo booth screen created by the Photobooth Setup Wizard
Customise your screens Customise your prints
Copyright Breeze Systems 2017